Descriptions are from left to right:
Views:
One-sided,Two-sided, ... Eight-sided
Displays one, two or more pages, in the main Image view.
We recommend using the Two-sided view when performing duplex scanning. This will ensure that the front and the rear sides of scanned and imported pages are consistently displayed as pairs, side-by-side.
Please note: The Image view cannot be moved or "docked", unlike the other views below.
Info view
Shows or hides the Info view. The Info view will display detailed (technical) image information.
Please note: The Info view may be moved about by "dragging" its title bar with the mouse. It can either be left separated ("floating") or it can be attached ("docked") to other views.
Index view
Shows or hides the Index view. The Index view will display index information, if index fields have been defined.
Please note: The Index view may be moved about by "dragging" its title bar with the mouse. It can either be left separated ("floating") or it can be attached ("docked") to other views.
Thumbnails
Shows or hides the Thumbnails view. Thumbnails provide a low-resolution preview of all scanned and imported images. Additionally, images may be modified using thumbnails. To do so, right click on one or more (highlighted) thumbnail images, this will open a context menu with further options.
Please note: The Thumbnails view may be moved about by "dragging" its title bar with the mouse. It can either be left separated ("floating") or it can be attached ("docked") to other views.
Tree view
Shows or hides the Tree view. The Tree view will display an abstract view of the current batch, organized as sets of documents and pages. This view is intended to give you an overview of the current batch structure, rather than image details.
Please note: The Tree view may be moved about by "dragging" its title bar with the mouse. It can either be left separated ("floating") or it can be attached ("docked") to other views.


Zoom:
Pointer
This is the normal viewing mode. Press this button to return from the magnifier mode described below.
Magnifier
Use the magnifier to get a better look at a specific area of an image, without zooming the entire image view.
Use the Pointer icon (see above) to return to normal viewing mode.
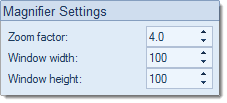
Magnifier settings
Change the settings for the magnifier:
Fit to window
Resizes scanned images to fit exactly into the image view window (images will be displayed in their entirety and without any scrollbars).
Adapt width
Resizes the scanned image to exactly match and fill the image view window's width (with no horizontal scrollbar being displayed).
Adapt height
Resizes the scanned image to exactly match and fill the image view window's height (with no vertical scrollbar being displayed).
1:1
Displays images in their original resolution. One pixel on the monitor corresponds to one pixel in the image.
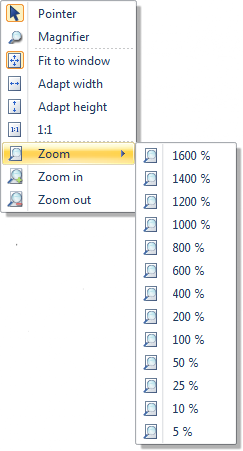
Zoom
Pressing the bottom half of this button presents a drop-down list of fixed zoom levels, for you to choose from.
Pressing the top half of this button steps through all zoom levels available.
Zoom in
Pressing this button zooms in to the image by one zoom level.
Zoom out
Pressing this button zooms out of the image by one zoom level.


Navigate:
Go to ...
Will take you directly (jump) to a desired page or document, without having to scroll up or down through the entire batch.
This function can also be invoked by double-clicking the batch status information, at the bottom left of the program window.
The following dialogue will appear:
Select Page or Document, enter the desired page or document number, then press OK.


Context menu (Image view)
Right clicking an image in the main image view will open the context menu shown above.
Use this as an alternative for invoking most of the functions available from the views toolbar.