You may use the quick access toolbar to customize your CROSSCAP installation. Using the quick access toolbar will usually also speed up work. The customized menu bar will provide access to all frequently used controls without having to switch back and forth between toolbars (ribbons), in the main menu.
You may pick every control available within the CROSSCAP main menu and copy it to the quick access toolbar.
Positioning the quick access toolbar
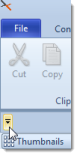
Immediately after program installation (since it has not been configured yet), the quick access toolbar is displayed as just a small arrow. Depending on the current settings, you will find the arrow either in the top left corner of the program window, to the right of the CROSSCAP logo:
or under the main menu, to the far left:
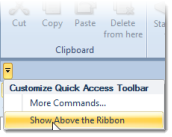
The following screenshots show the dialogue which will be displayed after clicking the arrow. In the first example, the quick access toolbar is located directly under the main menu, so a command Show Above the Ribbon is offered.
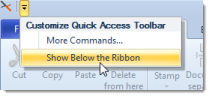
If the toolbar is already above the menu ribbon, then the dialog will show the Show Below the Ribbon command, instead.

Customizing the quick access toolbar
To begin placing controls in the quick access toolbar, first click the small arrow (as described above) and then the More commands…option (an alternative method using the context menu is described far below). The following window will open:
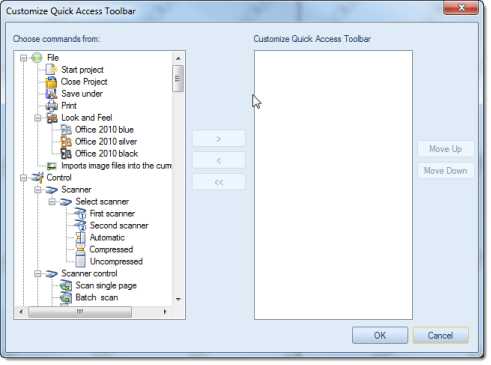
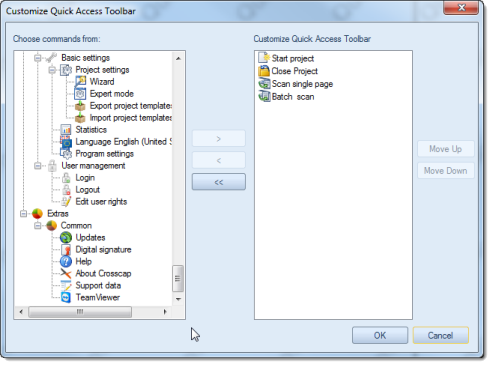
On the left side of the window there is a list (labelled Choose commands from:) with all controls available from the main menu. It has a tree structure which is in accordance with the main menu's toolbars and functional groups.You may now select any one control on the left and copy it into the Customize Quick Access Toolbar window on the right, by clicking on the button with the right-facing arrow >. Repeat as often as necessary. Eventually, the window will look something like this:
To delete unwanted controls, select an entry in the right-hand window and click on the button with the left-facing arrow < .
Unfortunately, it is not possible to select more than one entry at a time. However, an additional button with a double arrow to the left << is available, which will delete all (!) controls in the right pane.
The controls in the quick access toolbar list can be moved up and down by highlighting them and operating the Move Up or Move Down button. The control at the top of the list will later be displayed on the outer left side of the quick access toolbar.After clicking OK, the resulting quick access toolbar will look something like this:

Customizing the quick access toolbar (alternative method)
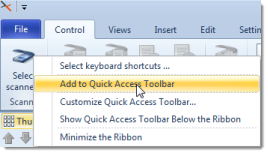
Another method for customizing the quick access toolbar makes use of the context menu: Right-clicking any control button from the main menu will present the following option: Add to Quick Access Toolbar.