In Quick mode, you may scan an unlimited number of pages and save the resulting images in a file format of your choice. Here's how to proceed:
Starting the scan:
In order to begin with scanning, insert a paper document into your scanner and click button Scan all pages (from toolbar Control).
Depending on the type of scanner selected, SCAMAX® scan+ will now either open the scanner's driver settings dialogue, or the program will directly proceed with scanning:
Once the scan has been performed, corresponding images will appear in the thumbnails and image views. If the scanner is capable of duplex scanning, then two images will be produced, one for the front and one for the reverse side of each paper document (sheet).
Now scan either further individual pages using the Scan single sheet button, or the rest of the entire batch using the Scan batch button.
To edit the images of the scanned pages, various tools are available on the edit ribbon.
If you need to change the order of the images scanned, or if you want to delete images, you will find appropriate tools in the insert ribbon. Some additional and specialist tools are available here, e.g. for inserting document separators, placeholders or for applying stamps.

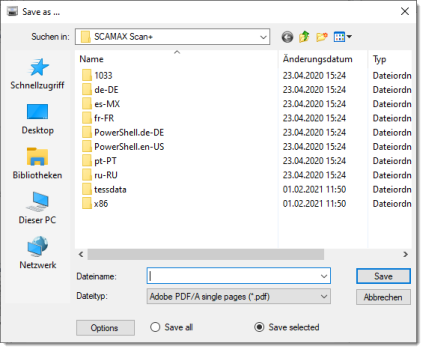
At this point in time, all images are kept in temporary storage, only. In order to permanently save these images to disk, you will need to switch to the File menu and select the save as option from the start menu:
In the following dialog, please select the desired file name (File name), the desired storage format (File type) and the storage location. SCAMAX® scan+ will extend the File name you enter with automatic numbering of the output files.
By selecting Save all or Save selection, you determine whether only the previously marked images or all images in the current batch are exported.
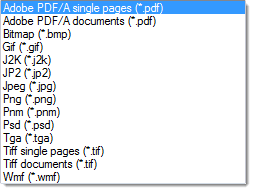
The following graphic shows the formats available as File type.

Congratulations! You have successfully saved your captured data and are now capable of running further scan jobs. Please note, however, that you have only used Quick Mode, so far. In order to make use of the full SCAMAX® scan+ functionality, you should switch to project mode, as soon as possible. For more information on this, please refer to the section on modes of operation.