Program start
Just as with other Windows™ applications, you may start CROSSCAP from the start menu, from within the Windows explorer or from an icon on the desktop.
If the application does not start or if you receive error messages, please contact our support department.
Licensing options
If a hardware dongle has not been shipped with your version of CROSSCAP (or if the dongle has not yet been plugged in), then the following licensing message will appear, during program launch:
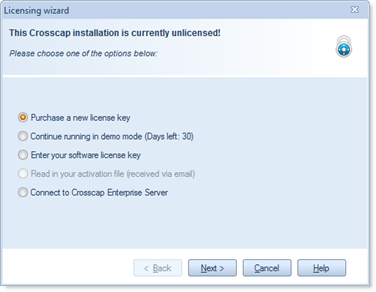 |
The licensing procedure will branch out differently, depending on your choice. Select the desired option, then press Next. |
If youre trial-period has expired (more than 30 days since installation) and you are not yet properly licensed, then the following, slightly different licensing message will appear:
 |
The licensing procedure will branch out differently, depending on your choice. Select the desired option, then press Next. |
Please refer to the sections below, for more details:
1) You are not in possession of a valid licensing key and have decided to purchase CROSSCAP:
2) You are not in possession of a valid licensing key but wish to continue testing CROSSCAP:
3) You are in possession of a valid licensing key and now want to apply and activate your license:
4) You are not in possession of a separate CROSSCAP licensing key but you do have access to a CROSSCAP Enterprise system. You will therefore be using one of the CROSSCAP Enterprise licenses available for CROSSCAP Scan-clients:
*) Your trial-period (30 days) has expired and you wish to continue testing CROSSCAP.
1) Purchase a new license key
You are not in possession of a valid licensing key and have decided to purchase CROSSCAP:
 |
Unfortunately, CROSSCAP cannot be purchased on-line. Instead, please contact our sales department, either by mail or phone. More information about purchasing CROSSCAP may be found on our website: www.crosscap.de.
Clicking Next will return you to the main screen of the licensing wizard. |
2) Continue running in demo mode
You are not in possession of a valid licensing key but wish to continue testing CROSSCAP:
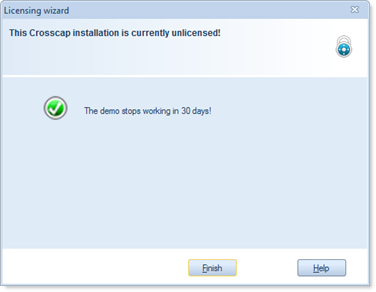 |
CROSSCAP will report the number of days remaining for your trial period. Clicking Finish will close the licensing window and launch the application. In demo/trial mode, all CROSSCAP functions are available, without restriction. Enjoy! |
3) Enter your software license key
You are in possession of a valid licensing key and now want to apply and activate your license:
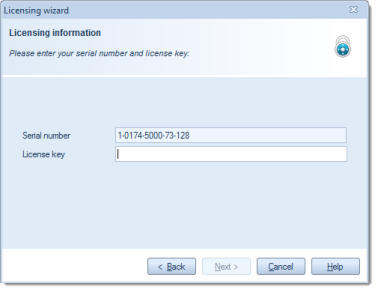 |
Firstly, you will need to enter global licensing information (serial number, license key), which you should have received when purchasing CROSSCAP. Enter both items, then press Next. |
In order to confirm the license and lock it to this installation, CROSSCAP will now initiate a license activation procedure.
 |
To begin with, CROSSCAP will ask you about the type of internet connection available ("how is this PC connected to the internet?"). Depending on your selection, license activation will be performed differently:
The first method is the most convenient, all three methods are detailed further below. Select the desired option, then press Next. |
|
|
When using the Full internet access option, additional proxy settings might need to be set. If in doubt, please contact your local IT-support for help and advice. If applicable, enter your proxy server address and your server credentials, then click OK.
|

Enter your software license key (full internet access):
There is nothing more to do: CROSSCAP has automatically performed product activation, in the background. Congratulations, your product is now fully licensed and ready for use.
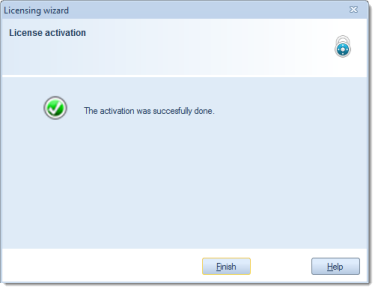 |
Clicking Finish will close the licensing wizard and launch the application. |
Enter your software license key (limited internet access):
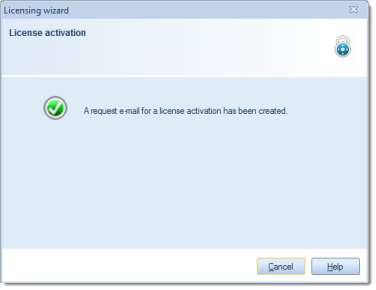
After selecting this option, a separate window (from an e-mail application) should appear elsewhere on screen and present you with a draft e-mail containing all that is required to initiate license activation: an activation request file, the correct mail addressee and a return mail address. All you need to do is to press the Send button, the mail will be sent and the mail-window will close.
 |
You may also close the CROSSCAP licensing wizard for now (by clicking Cancel), until the activation key is finally received (it will be returned as an activation file attached to an e-mail). |
Open your e-mail application and regularly check for incoming mail. Eventually, you should receive the CROSSCAP licensing response. Detach the attached activation file or save a copy to any convenient location.
Next, re-start CROSSCAP.
|
|
The licensing wizard will present an additional option:
Select this option, then press Next. |
|
|
You will now need to direct the licensing wizard to the location where you stored the activation file, in the previous step. Either enter the full file path and file name manually, or use the button at the end of the entry box Once the activation file has been properly identified, press Next. |
 to start a file browser.
 |
Congratulations, your product is now fully licensed and ready for use. Clicking Finish will close the licensing wizard and launch the application. |
Enter your software license key (no internet access):
This step will generate a licensing request file, which you will subsequently need to send off via e-mail, from some other PC.
 |
Choose a location for saving the licensing request file. This might be some location on one of the internal hard drives or (more conveniently) a portable USB (thumb) drive. Either enter the full file path and file name manually, or use the button at the end of the entry box Press Next to save the request file. |
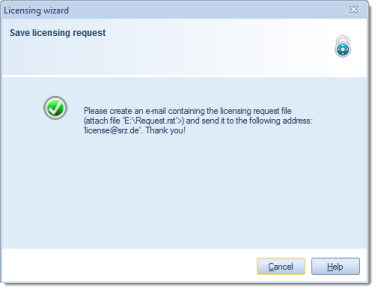
After creating the licensing request file, you will need to move or copy this file to a PC with internet access. On that PC, create and send off an e-mail containing the following:
- the activation request file (as attachment)
- the correct mail addressee (license@srz.de)
- a valid return mail address.
 |
You may close the CROSSCAP licensing wizard for now (by clicking Cancel), until the activation key is finally received (it will be returned as an activation file attached to an e-mail). |
Check for incoming mail regularly. Eventually, you should receive the CROSSCAP licensing response.
Save a copy of the activation file to a portable USB (thumb) drive, or to a common network drive, if available. Whichever method you choose, you will need to makethe activation file available on the PC running CROSSCAP. Next, re-start CROSSCAP.
 |
The licensing wizard will show an additional option:
Select this option, then press Next. |
 |
You will now need to direct the licensing wizard to the location where you stored the activation file, in the previous step. Either enter the full file path and file name manually, or use the button at the end of the entry box [...] to start a file browser. Once the activation file has been properly identified, press Next. |
|
Congratulations, your product is now fully licensed and ready for use. Clicking Finish will close the licensing wizard and launch the application. |
4) Connect to Crosscap Enterprise
You are not in possession of a separate CROSSCAP licensing key but you do have access to a CROSSCAP Enterprise system. You will be using one of the centrally managed CROSSCAP Enterprise licenses for this CROSSCAP Scan-client:
 |
Enter the Server-URL (network address) of the machine running the CROSSCAP Enterprise process server. The address needs to be formatted as follows: Replace server with the network name of your CROSSCAP Enterprise server (the default port is 80, adjust only if necessary). Press Next to continue. |
After successfully linking to a CROSSCAP Enterprise system, please remember to double-check all of the related program settings (see chapter Program settings, Common settings, section Enterprise Server).
*) Request an extended trial period
 |
Option Create request e-mail automatically will proceed according to the instructions for Enter your software license key (limited internet access), outlined further above. Option Create request e-mail manually will proceed according to the instructions for Enter your software license key (no internet access), outlined further above. Please note that the e-mail addressee, the subject line and the attached file need to be changed according to the instructions on screen, as shown to the left. |