Compression Mode
This setting determines if file compression is used for temporary image data. Though compression will reduce the storage space required for temporary and exported image data, it may also lead to a loss in quality and may cause compression artefacts.
Use the drop-down list to choose from one of these options:
Please note: Only greyscale and colour images are affected by these settings, CROSSCAP Enterprise invariably applies lossless compression to bitonal images.
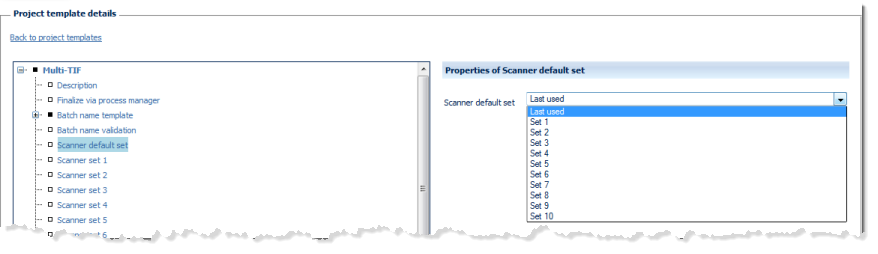
Scanner default set
Select the default scanner preset to be applied whenever a new batch is started. Either choose from one of the available scanner presets (see next section, Scanner sets), or have the program suggest the preset you used most recently (Last used).
Scanner set 1, Scanner set 2 ... Scanner set 10 (Scanner presets)
Scanner presets allow you to store the scanner settings you most frequently use and recall them as required. Please note that not every scanner driver will support presets (in which case all changes to scanner settings will have to be made on-the-fly).
Use this function to assign names/descriptions to your scanner presets.
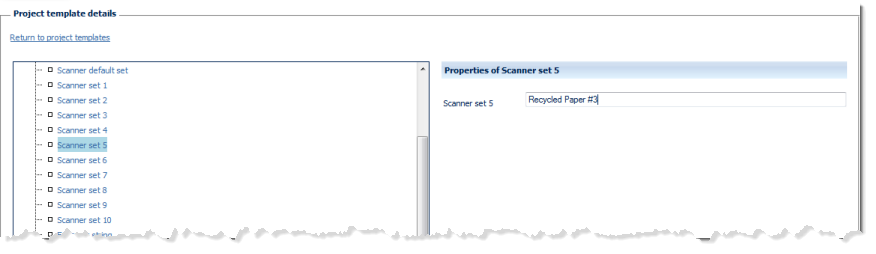
The CROSSCAP Enterprise Administration client merely allows you to assign names to any of the 10 available presets. The presets themselves are defined using one of the CROSSCAP Scan-Clients. For details, please refer to the CROSSCAP Scan-Client manual.
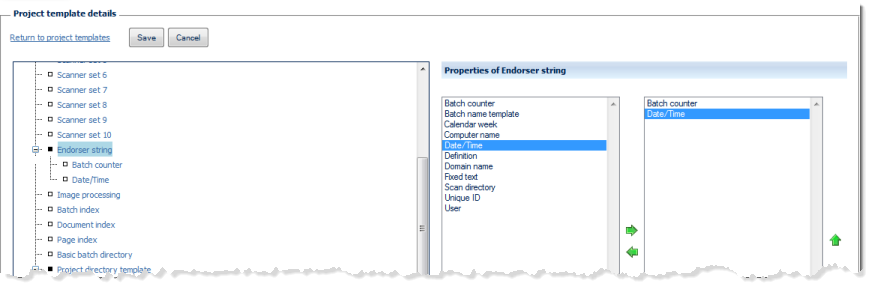
Endorser string
The endorser string is passed on to the attached scanner, where it is printed on all pages which have been scanned, so far (provided the scanner is equipped with a printing option). Please note that not every scanner driver will accept external endorser strings.
You may use any of the available variables (such as date/time, calendar week, batch counter and/or fixed text) for assembling the Endorser string. For more and detailed information on variables please refer to the separate section on the Use of variables, in the Appendix.
The left side of the Properties of ... window lists all configuration options available for this item, the right side shows the options chosen so far. By highlighting one of the options and operating the green left or right arrow buttons, the option can be moved back and forth between the left column (available options) and the right column (selected options). If an option is highlighted in the right column (selected options), it may be moved up or down the list by operating the green up or down arrows. This changes the sequence in which the options are executed (processing will proceed from the top of the list).
Any items in the right column (selected options) will also appear in the configuration tree (far left), where they can be highlighted for further configuration.