Contents:
Description
Process manager
Thresholds (Signature)
Batch naming
Scanner settings
Document separator position
Presets
Image processing
Index fields
Directories
Export options
Software counter
File importer
Creating additional and deleting unwanted project templates is covered in chapter Main menu (Server), in section Templates toolbar.
This chapter deals with configuring and modifying existing project templates, using the CROSSCAP Enterprise administration client.
Please note: Project templates may also be created and configured using the CROSSCAP Scan-Client, which offers a somewhat more comfortable and more intuitive configuration method. We therefore recommend the use of the CROSSCAP Scan-Client, for this particular purpose. Please refer to the separate CROSSCAP Scan-Client manual, for details.
Starting point for the configuration of any project template is either the All templates list, from the Templates toolbar, or one of the Batches or Batch log views, from the Batches toolbar. Simply click on the name of the desired project template, the display will then switch to the respective Project template details view:

The configuration tree on the left covers all items which can be modified. Depending on complexity, items will branch out to varying depths of detail.
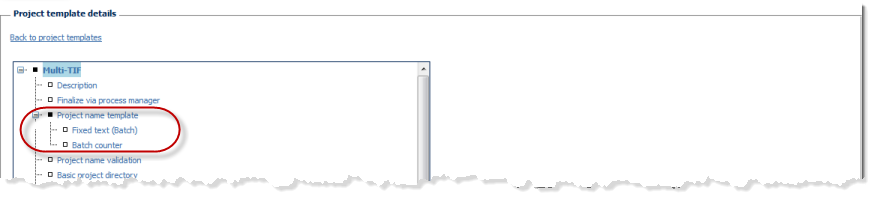
Navigating the configuration tree
Initially, the configuration tree is fully collapsed and none of the branches are visible. Plus signs and filled in bullet points indicate items which may be expanded into branches. Clicking one of the plus signs will open the desired branch:
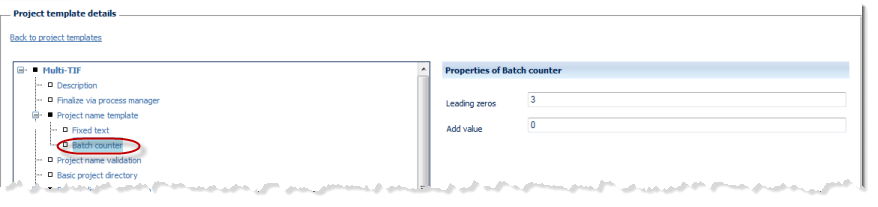
If you wish to further inspect or modify an item, simply highlight the item by clicking it once. A Properties of ... window will open on the right hand side of the screen. Depending on whether the item contains configuration sub-options or not, the system will either display a selection menu or it will allow item configuration.
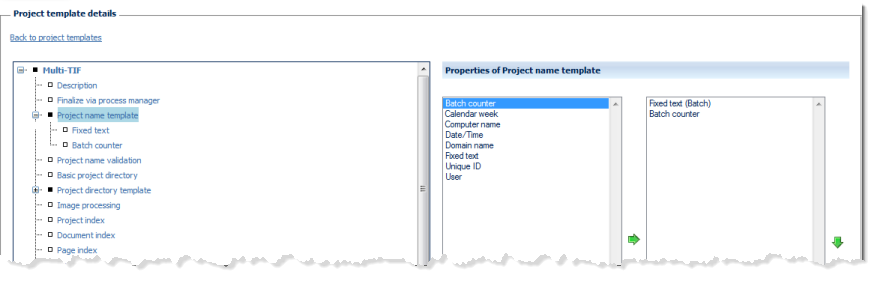
In this case, the left side of the Properties of ... window lists all configuration sub-options available for this item, the right side shows the sub-options chosen so far. By highlighting one of the sub-options and operating the green left or right arrow buttons, it can be moved back and forth between the left (available options) and the right (selected options) column.
If an option is highlighted in the right (selected options) column, it may be moved up or down the list by operating the green up or down arrows. This changes the sequence in which the options are executed (processing will proceed from the top of the list).
Any items in the right (selected options) column will also appear in the configuration tree, where they can be highlighted for further configuration.
Detailed instructions for the input of configuration data may be found in the next section, Description.