The buttons in this toolbar may be grouped into two sections: Global Settings (button far left) and User administration (all other buttons).
Settings (button)
The Settings button will display the following list of global program settings:
Settings may be changed by clicking the icon in the Edit column.
Once changes have been made, they need to be confirmed by clicking the save (diskette) icon.
Default group for new project templates
Specifies the default group assigned during template creation (may be changed afterwards).
Delete data
The number of days the system will wait before deleting batch metadata. This value may be reduced to 0 (zero), in order to have batch metadata removed from the system as fast as possible. However, since data purges are performed periodically, as part of regular system housekeeping, they will not necessarily take immediate effect.
Please note: Two items determine system behaviour during workflow step Delete (see chapter Getting started, section Workflow CROSSCAP Enterprise): Delete data (specified here) and Delete images (specified elsewhere, see Templates toolbar in this chapter).
Temporary image data (created during batch processing) is deleted in a separate step before corresponding batch metadata are finally removed from the database. This sequence prevents "orphaned" temporary image data. As a consequence, the deletion periods will add up and - in sum - determine the total time required to purge all batch data from the system.
Use direct export
May be set to either 1 (true) or 0 (false). If set to 1 (true), this setting will cause CROSSCAP Enterprise to merge workflow steps "Process" and "Export" into one (see section Workflow CROSSCAP Enterprise in chapter Getting started). This will free up the storage space for temporary files required if "Process" and "Export" are treated separately.
Please note: Adding a digital signature will disable this setting.
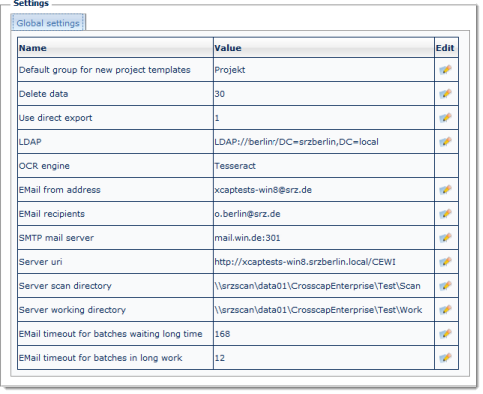
LDAP
CROSSCAP Enterprise authentication may be passed on to an LDAP server, whenever internal authentication (purposefully) fails. For this mechanism to work, you will need to enter an LDAP server name plus the desired LDAP authentication method, in the following format: ldap://hostname/authentication_method
OCR engine
By default, CROSSCAP Enterprise will install an open-source OCR engine, Tesseract. As an alternative, Abbyy FineReader may be used (additional licensing is required, please contact our sales department for details). Use this option to switch between Tesseract and Abbyy FineReader.
For more details on OCR, please refer to the Appendix, section OCR (Appendix).
EMail from address, EMail recipients, SMTP mail server, Server-uri, EMail timeouts
Use these settings to configure CROSSCAP Enterprise server to send you notification e-mails whenever batch processing has run into problems or whenever batches are overdue:
Please note: This push service requires an open SMTP server, there is no authentication.
Enter the desired sender e-mail address, here.
EMail recipients
Enter one or more e-mail target e-mail addresses, here.
SMTP mail server
Enter the smtp server's hostname, plus the port number for the smtp service.
Server-uri
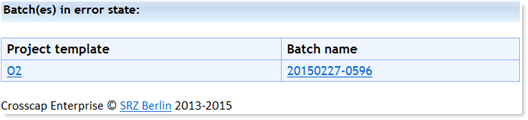
The e-mail notification will contain a table with the batch names of all failed or overdue batch jobs, as well as their respective project templates (see sample image above). It will also provide direct links to all batches and templates in question.
The server URI specified here (the external server address) will make sure that these links will consistently work, regardless of which internal network address may have been assigned to the CROSSCAP Enterprise server (e.g. during load balancing or after fail-overs).
Server scan directory
The server scan directory is a shared directory used by CROSSCAP Scan-Clients, when handing over scanned images to the CROSSCAP Enterprise server. Usually, this will be a directory on the server machine.
The directory needs to be entered manually and in UNC format: Enter two backslashes, then the server hostname, then another backslash and the full directory path (which may include further backslashes), e.g. \\winserver\CrosscapEnterprise\Scan.
Server working directory
The server working directory is a shared directory used by CROSSCAP Enterprise server, for storing and exchanging temporary image data. Usually, this will be a directory on the server machine.
The directory needs to be entered manually and in UNC format: Enter two backslashes, then the server hostname, then another backslash and the full directory path (which may include further backslashes), e.g. \\winserver\CrosscapEnterprise\Work.
The directories specified above may be located anywhere in the CROSSCAP Enterprise network. Please note, however, that the CROSSCAP Enterprise server will need to access these directories quite frequently. Therefore, a higher network load is to be expected if theses directories are not located on the server machine.
EMail timeout for batches waiting long time
Specifies the time in hours, after which a warning will be issued for batches which have been queued for too long. Such batches may be on hold because they are waiting for manual indexing or QA, or because they have been returned to one of the CROSSCAP Scan-Clients and were never re-opened. If this timeout is exceeded, a warning will be issued via the e-mail push service configured above.
EMail timeout for batches in long work
Specifies the maximum batch processing duration (the time spent by the CROSSCAP Enterprise server in the processing workflow stage, in hours. See section Workflow CROSSCAP Enterprise in chapter Getting started). Whenever this timeout is exceeded, a warning will be issued via the e-mail push service configured above.
Managing user rights is a method of restricting access to certain parts of the program functionality by preventing access to respective icons. This might prove helpful, for example, when employing less skilled staff for performing scan jobs: Any of the more complex and intricate program functions (such as those required for creating and editing project templates) can be selectively deactivated and thus protected, using user rights.
CROSSCAP Enterprise user management has no effect outside the bounds of this application. The Windows operating system and other Windows applications will remain unaffected by any of the settings descibed below.

CROSSCAP Enterprise user management is based on user groups, which usually correspond to certain user roles. The general approach is as follows:
When users log on the CROSSCAP Enterprise system, they will be assigned appropriate access rights..
Group list
Pressing this button will result in the display of two windows: The Group list window (left) and the Group rights Administrator window (right).
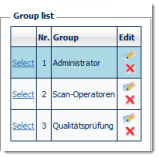
Group list (left window)
A listing of all user groups/roles available. Depending on which group is currently selected (use Select to switch), the appearance of the Group rights ... window (see below) will change. Initially and by default, the Administrator group will be selected (Group No. 1).
The Group list window may be used to rename or delete groups, by clicking the appropriate icon in the Edit column.
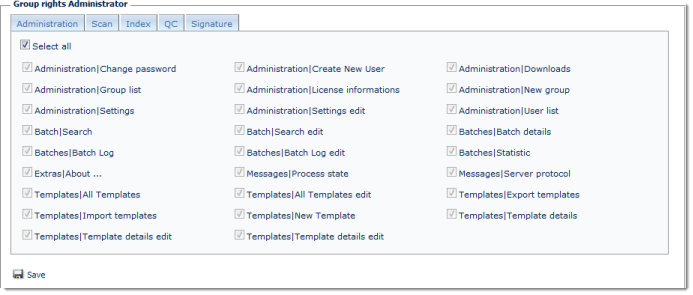
Group rights ... (right window)
User rights are granted or withdrawn on the basis of individual CROSSCAP Enterprise functions/icons - of which there are quite a few.
In order to simplify the process, user rights have been sorted into Administration, Scan, Index, QC (Quality check) and Signature classes. Tabs at the top of the Group rights ... window correspond to these classes, and you may switch between them by pressing the respective tab.
Within any of the tabs, checking or unchecking the Select all checkbox will collectively turn all functions for this class on or off. By selectively checking and unchecking individual functions, user rights settings may be further refined.
Please note: The Scan, Index and QC tabs contain a very large number of functions. For this reason, the display changes into a scrollable window, for any of these three tabs. Use the slider on the right hand side of the window to scroll down and see more functions ...
New group
Enter a suitable group/role name, then click button Add.
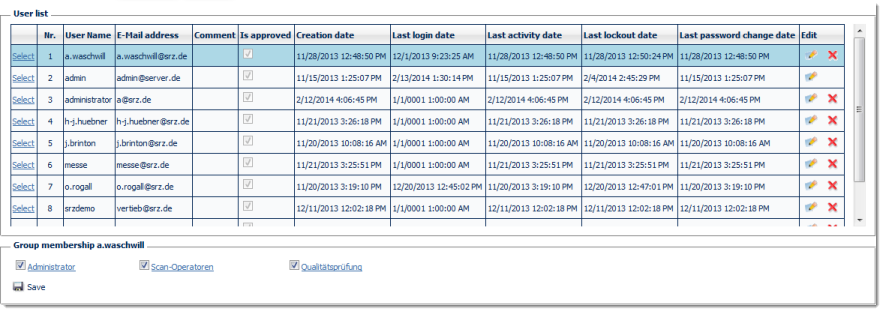
User list
The top section of this window (User list) is a list of all users known to this CROSSCAP Enterprise system, together with a set of system timestamps (creation date, latest activity etc.).
User entries may be modified or deleted by clicking the appropriate icon in the Edit column. Users may be deactivated (without completely deleting their entries) by unchecking their respective Is approved tick box (you will need to open their entry for editing first, then make and save your changes).
Please note: User Administrator is given and cannot be deactivated or deleted.
The bottom section of this window (Group membership ...) will display all group/role assignments for any one user. Use the Select link in the first column of the User list (above) to switch to a different user.
After the desired user has been selected, tick or uncheck the checkboxes in front of the groups/roles, as required. Any changes to group membership will need to be confirmed by pressing the Save icon.
Create user
When choosing user names, please consider that these will be used in three different instances: When signing in to the administration client and when logging on to the CROSSCAP Scan-Client or the CROSSCAP Multi-Client.
In case of the CROSSCAP Scan-Client and CROSSCAP Multi-Client, the application will attempt to match CROSSCAP Enterprise user names with Windows credentials: If the PC user has logged into the Windows operating system with a known user name, then CROSSCAP Enterprise will admit this user into the system without further password check. In all other cases, the application will ask for the CROSSCAP Enterprise user name and password.
Therefore, it is advisable to choose identical Windows and CROSSCAP Enterprise user names, wherever possible.
Important: Automatically logging into the CROSSCAP Enterprise system is only possible if the user has a Windows passwort assigned. Windows accounts without password protection cannot be used, for this purpose.
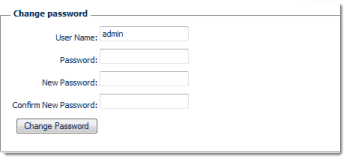
Kennwort ändern
This dialogue will enable users to change their password.