Contents
01-Common
02-Name
03-Scanner
04-Presets
05-Image processing
06-Index fields
07-Directories
08-Export
09-PowerShell
This chapter will provide you with the information required for configuring project templates.
Quick mode will allow you to quickly and easily scan a small amount of documents. However, only Project mode will give you full access to the wealth of features available in SCAMAX® scan+ (see chapter Getting started, Modes of operation).
First, you will need to input all appropriate project settings into a project template, then you may use that template to start and control your batches ...


The sections on the right side of this window (1 - 9) will be discussed individually, below. The settings configured there apply to the project template selected or highlighted in the left-hand window.
The sections on the right side of this window will be discussed individually, below.
Create new Projekt templates
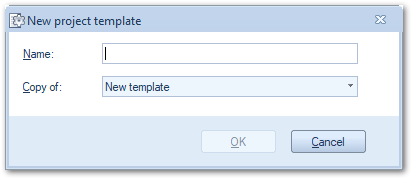
There are four ready-made (standard) project templates, which are delivered with the program. You can create additional project templates either from scratch or on the basis of existing project templates. To do this, click the New button. The following window opens:
Procedure
-
In the top line (New Name), enter the name you want for the new project template.
-
In the second line (Copy from ...), an existing project template can be selected as a template for the new project template - all settings of the existing project template will be transferred to the new project template. If an empty project template is desired, leave the selection on New Template.
-
The third line (role) is only visible when user management is turned on. Here you can select a user role to which the new project template will be assigned. Only SCAMAX® scan+ users who belong to this role con use and modyfy the new project template. For all other users, the new project template is invisible.
You can find out more about this topic Menu bar functions, settings toolbar, section User management.
Changes to the Project Template in Project mode
If you open the project settings while SCAMAX® scan+ is in Project mode, you will see a temporary copy of your selected template with the batch name added to the template name already selected. This copy represents the settings of the currently open batch, and any changes made to it affect only the current batch and are not written back to the original template. Not all settings are available in this copy. To make changes to project templates, we recommend closing the active batch and working with the original templates.