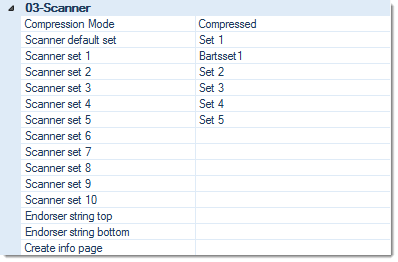
Compression mode
This setting determines whether or not lossy compression is applied to temporary image data.
Only greyscale and color images are affected by these settings, since CROSSCAP generally applies lossless compression to all types of images. Lossy image compression will further reduce the storage space required for color or grayscale image data, but it will lead to some reduction in quality and - in rare cases - may cause compression artifacts.
Use the drop-down list to choose from one of these options:
Please note that any (further) compression applied to exported image data is controlled from within export definitions, but not here ...
Scanner default set
Select the default scanner preset which will be applied whenever a new batch is started.
Either choose from one of the available scanner presets (see the next section, Scanner sets), or have the program apply the preset which was most recently used (Last used).

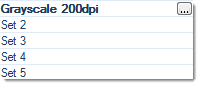
Scanner set 1, Scanner set 2, ... Scanner set 10 (Scanner presets)
Scanner presets allow you to label and store scanner settings you frequently use and recall them from within a batch job. Please note that not every scanner driver will support scanner presets (in which case all changes to scanner settings will have to be handled via the scanner's TWAIN interface).
Before scanner sets can be configured, the target scanner needs to be on-line and must have been selected with the Select scanner button, on the Control or Settings tab. Please refer to section Control Toolbar, if in doubt.
On the right hand side of this section, you can define custom programming and labelling for each of the scanner sets:
to launch the currently attached scanner's TWAIN interface, then change settings as required. After all necessary changes to scanner settings have been made, close the TWAIN interface (usually with OK).
CROSSCAP has tracked and memorized all settings you made from within the scanner's TWAIN interface. These settings will now be applied (i.e. sent to the scanner) whenever this scanner set is used as the Scanner default set or whenever the user presses the Select scanner setting button, for this particular scanner set.
Endorser string top, Endorser string bottom
The endorser string is passed to the attached scanner at the beginning of each new batch. It will either be printed on all front pages (Endorser string top) or rear pages (Endorser string bottom), provided the scanner is equipped with a printing option - not all scanners are. Also, please note that not every scanner driver will accept external endorser strings, such as these.
You may use any of the available variables (such as date/time, calendar week, batch counter and/or fixed text) for compiling an Endorser string. For more and detailed information on variables, please refer to Use of variables, in the Appendix.
The left window contains the list of available variables, which you may add to the list of selected variables, on the right. After highlighting any of the selected variables in the right window, the bottom window will show detail settings, for this variable (Properties of ...).
Two items are offered in the left section (Available), which appear nowhere else, within CROSSCAP: Endorser InoTec SCAMAX® 4x3 and Endorser InoTec SCAMAX® 8x1. These variables are specially designed for use with these scanners and amongst other things, they will allow you to add dynamic content to endorser strings (such as page or document counters).

Create info page
Based on an RTF template (the contents of which can be freely arranged and formatted), this function will create one or more pages with batch information and send them to the current user's Windows default printer, for output.
The resulting paper output can be used to identify scanned document piles and will simplify handling later on in the process, e.g. when archiving paper documents.
Please note: Windows default printers are user-dependent and may need to be changed and properly configured, before using this function. Any Windows printer can be used, this includes quasi-printers such as print-to-PDF drivers ...
Input:
Count of copies
Enter the number of copies required.
RTF filename
Enter the path and the filename of the RTF template to be used. This RTF file needs to be exist before proceeding with the Create info page function.
You may place any amount of placeholders anywhere in the RTF template. These placeholders will be replaced with the current content of CROSSCAP variables, whenever the Create info page function is triggered.
Placeholders need to be distinguishable from other, regular text, therefore it is advisable to use unusual strings such as #1$ (placeholder one), #2$ (placeholder two), and the like.
Placeholders, surrounding text and any other RTF content may be arranged and formatted as desired.
Print definition
Each print definition assigns one or more CROSSCAP variables to one of the placeholders in the RTF template. You will need to create as many print definitions as there are placeholders in the RTF template.
You may use any of the available variables (such as date/time, calendar week, batch counter and/or fixed text). For more and detailed information on variables, please refer to Use of variables, in the Appendix.
Trigger
Choose one of the follwing conditions to trigger the Create info page function:
Page number
Enter the page number for triggering the Page N scanned function on the nth page, here.
Has no effect (and does not need to be changed) if any other trigger was chosen.
