This function will collect all export files (created by other export functions from the current batch) and forward them as e-mail attachment(s).
An external SMTP-Server is used for mail transmission, the resulting e-mail will therefore be sent directly and without further interaction.

SSL-Encryption
Tick this checkbox if communication with the SMTP server needs to be encrypted.
Host
Enter the name of the SMTP-server to be used.
Port
Enter the port-number for the SMTP service.
User
Credentials for the SMTP-server: username.
Password
Credentials for the SMTP-server: password.
Sender
Specify the originating e-mail address (which will also be the return address).
TO
Enter the e-mail address of the recipient.
CC
Enter the e-mail address of the recipient to whom a copy should be sent.
BCC
Enter the e-mail address of the recipient to whom a blind copy should be sent.
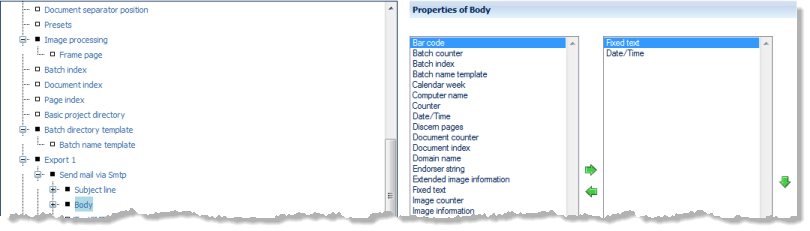
Properties of Subject line

You may use any combination of available variables (such as date/time, calendar week, batch counter and/or fixed text) for dynamically creating the mail's subject line. In its simplest form, the subject line might be made up of just one Fixed text variable, filled with an (unchanging) text string of your choice.
For more and detailed information on variables please refer to the separate section on Variables, in the Appendix.
Adding configuration options
The left side of the Properties of ... window lists all configuration options available for this item, the right side shows the options chosen so far. By highlighting one of the options and operating the green left or right arrow buttons, the option can be moved back and forth between the left column (available options) and the right column (selected options). If an option is highlighted in the right column (selected options), it may be moved up or down the list by operating the green up or down arrows. This changes the sequence in which the options are executed (processing will proceed from the top of the list).
Configuring configuration options
Any items in the right column (selected options) will also appear in the configuration tree (far left), where they can be highlighted for further configuration.